Now I cheated on this project a little and bought the bottles and clamps from ETSY. I had birthday money and didn't want to hassle with trying to put this piece together myself. http://www.etsy.com/shop/GreatBottlesofFire is the vendor i bought the set from and it was at my doorstep a week after ordering.... However I know money can be an issue so I have the instructions on how to make them below with supplies you can purchase at your local hardware store.
You will need (per vase):- (1) Empty wine bottle of your choice
- (1) Top plate connector/ceiling flanges (3/8″ size)
- (1) 1″ split ring hanger
- (2) screws to fit and hold the top plate connector (you may also want drywall anchors if you are not mounting directly into studs or another material)
- (1) piece of 3/8″ threaded rod, cut into 2 1/2″ pieces.
- 1/2″ double sided foam mounting tape (optional – if your bottle’s neck is smaller than 1″, like ours were)
- Silk flowers of your choice.
1. With a hack saw, cut your threaded rod down to size. Ours were about 2 1/2″ long, as we didn’t want our bottles hanging out too far from the walls. If you are hanging multiple bottles, just be sure you cut your pieces to equal sizes.
2. Position the top-plate connector on your wall, and mark the holes where the screws will go. Pre-drill the holes, insert any necessary drywall anchors, and then attach the plate to the wall.
3. Screw in your cut rod pieces, and then your split ring hanger.
4. If your wine bottle has a narrow neck (the 1″ split ring is loose around it and doesn’t fit snugly), apply a layer or two (as needed) of foam mounting tape to the neck of the bottle where it will be held by the split ring. Remove the backing from the other side of the tape, position the bottle in the split ring, and tighten the screws to secure in place. Pop in your flowers and voila!
My bottles came with the foam mounting tape. I think it really makes a difference and causes less friction on the glass.

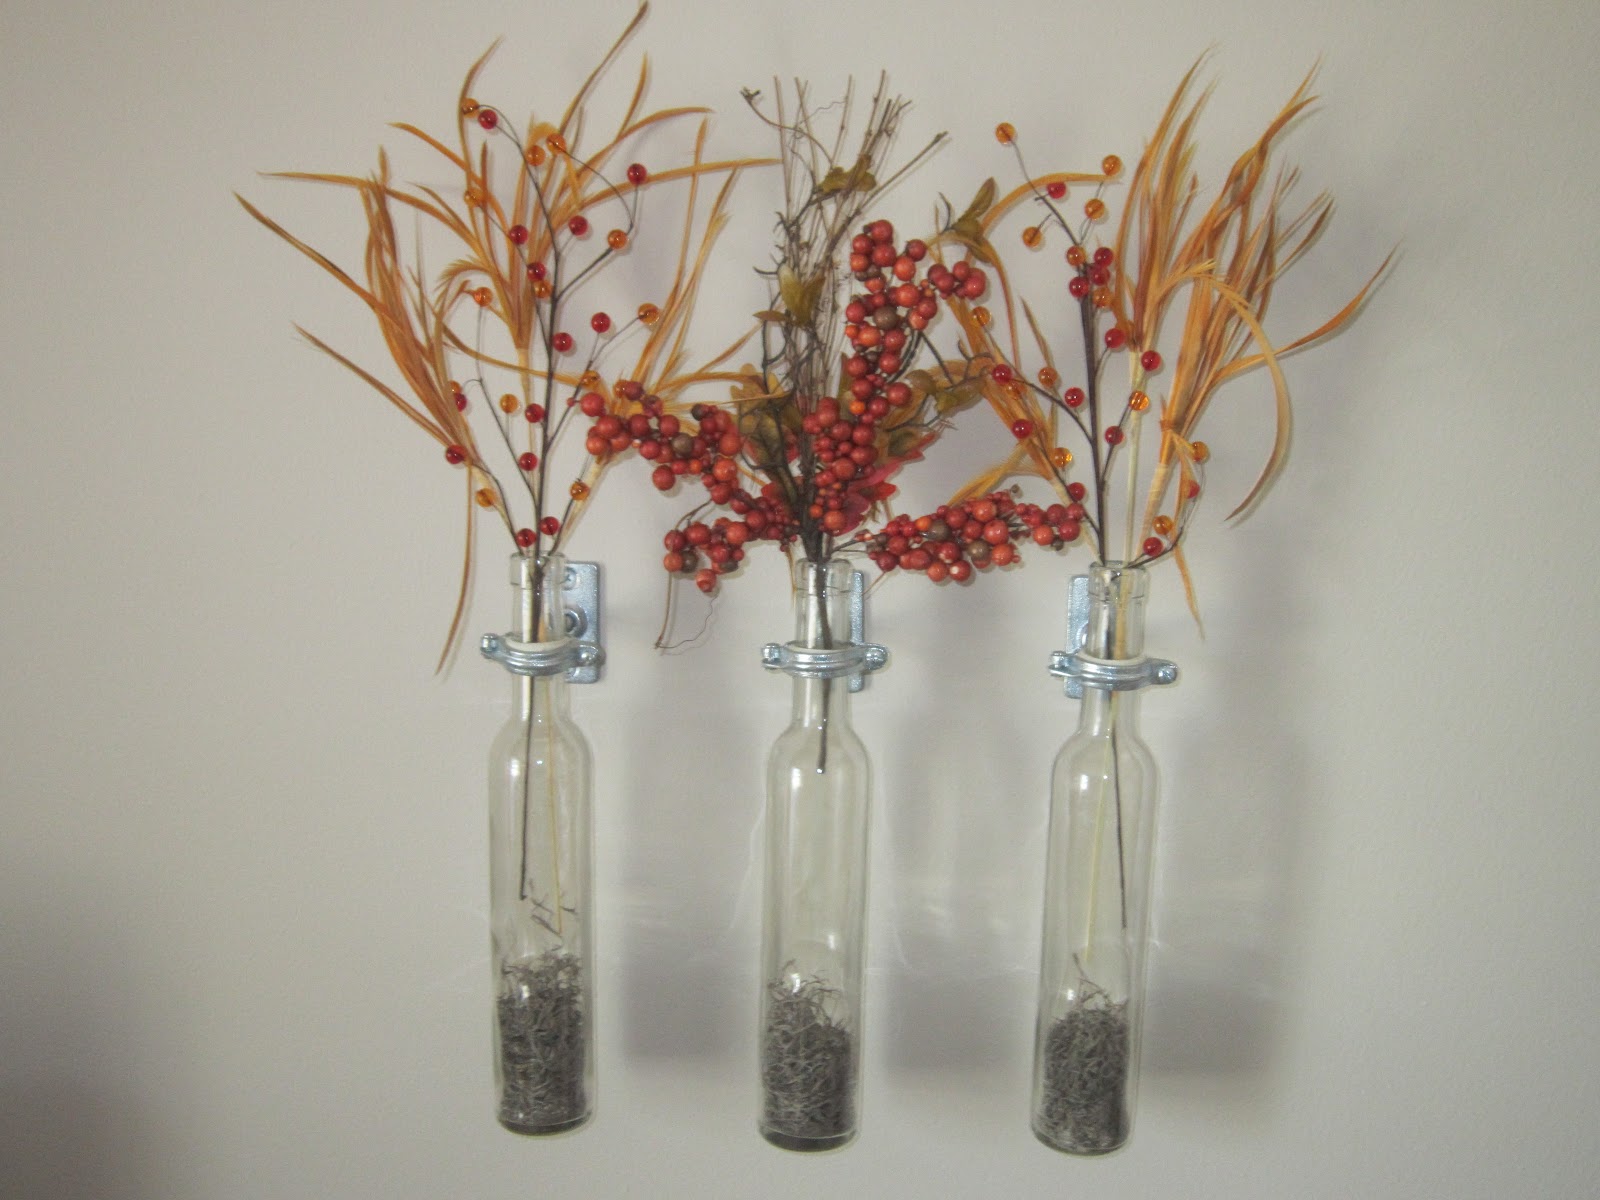
The first step after everything is assembled is to screw them into the wall. Make sure you find studs because they can get very heavy depending on what you decide to put in them. Screw the plate into the wall without the wine glasses, and once they are in the spot you like you can screw the glasses on. I found it was easiest to put your filler in the bottles before they were mounted on the wall, so as you see here I have inserted some rustic moss... a common theme in my decorations especially for fall. You can add rocks, marbles, fake snow, glitter, the options are endless, and thats what makes this project fun.


I used the straw pieces for the back because they were more full and create more depth. Whatever you decide to put in the bottles you should put the larger one in the back for a more dramatic look

Lastly add the last piece in the middle bottle and voila! your piece is finished! You can make all the bottles match, have them all different, or just change the middle like I did in this picture. I personally like how it looks with the middle one different that the two outer bottles. This piece is perfect for living rooms, breakfast nooks, or bedrooms because as mentioned there are so many endless options for this. I plan on adding some pine holly and fake snow for Christmas time!

This is what I have for off seasons, the feathers and flowers were both purchased at Michaels.


Posted by EE
No comments:
Post a Comment